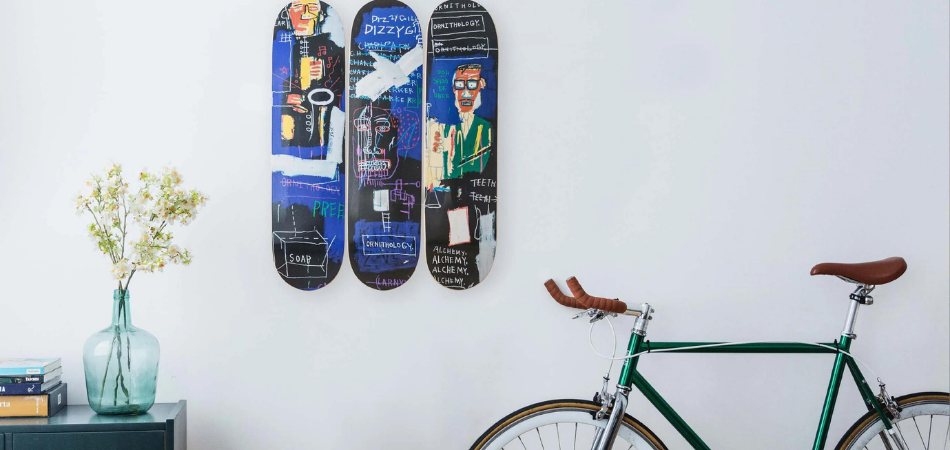
Hanging your skateboard on a wall can provide versatile benefits, including keeping your board well organized. The skateboard can work as a wall decoration, and also it’s the best way to show off your deck art or custom design.
In short, hanging your skateboard is one of the most reliable ways to display your edition. And from vertical to horizontal, you can hang your skateboard to highlight its design or preference.
So, how to hang a skateboard on the wall? You can easily hang your skateboard in many ways, including drilling and without drilling the wall. And if you want to get complete guidance on skateboard hanging, stick.
What Is the Purpose of Hanging a Skateboard?
Whether you choose a skateboard for under 100 dollars or more than 1000 dollars, you’ll find a unique artistic art deck design among almost all of them. And the attractive deck art design is the unique side of skateboards that most skateboarders love to show off.

However, when it’s about showing off the deck design, nothing could be a good solution than hanging the deck on the wall. It’s one of the best ways to display your unique collection of artistic decks in front of your family, friends, and even well-wishers.
Besides displaying the unique collection of artistic decks, hanging them is also the best solution to keep them in order. Moreover, it is also an effortless solution to storing your skateboards as well.
How to Hang Skateboard on Wall?
How to hang your skateboard on the wall? Mounting a skateboard is not an arduous task, and you can hang it in different ways. And some of the hanging methods are included below. Have a look:

1. Using Fishing Line
Using fishing lines is one of the most common and used methods to hang a skateboard on the wall vertically. It’s an easy, affordable, and effective solution that anybody can follow.
And to hang your skateboard with the help of fishing line, you’ll need some tools, including:
- A hammer
- Fishing line
- Nail or wall hanger
- Scissors
Once you arrange all the necessary tools and equipment, the next thing you have to do is follow the below-mentioned steps. Here we’ll show you the step-by-step process of hanging your skateboard on the wall with fishing lines. Have a look:
- Remove All the Attached Accessories: When using the fishing line to mount your skateboard to the wall, proceed with the mounting process by removing all the attached accessories. This means you have to remove the trucks and screws from the deck.
- Insert the Fishing Line: The very next thing you have to do is insert the fishing line into the top screw holes of your skateboard holes. Then cut the string with scissors and take a length of 10 inches or more. Insert the fishing line in one hole and bring it out through the other one.
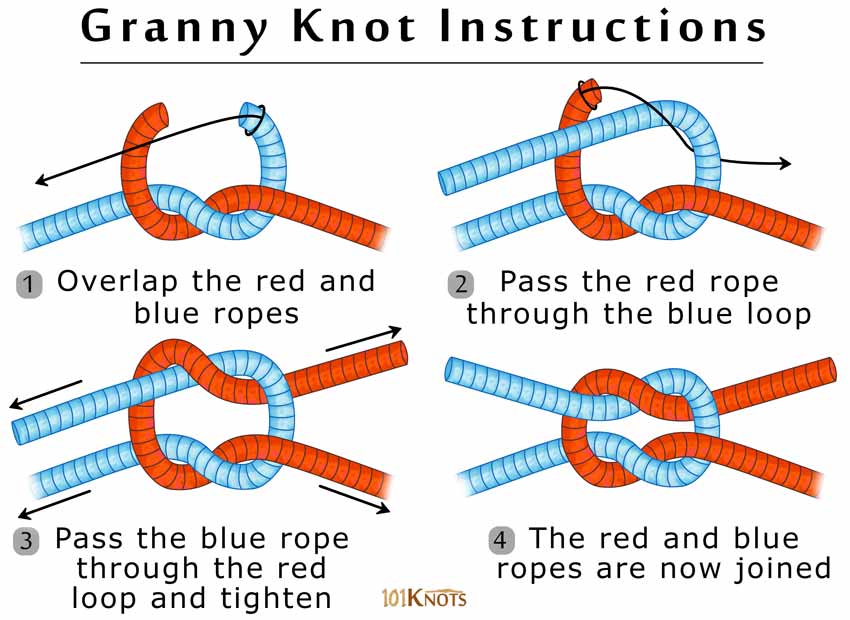
- Tie a Knot: It’s time to knot both ends of the fishing line. Since the fishing line is quite slippery, try to make a granny knot to ensure the knot will never come off. Try to make a knot by leaving some space to make the hanging process easier.

Image Credit: 101knots
- Hammer the Nail or Wall Hanger: Here is where the essential part comes, and you have to select a suitable place to mount or hang your skateboard. Use a hammer to attach the wall hanger or nail to insert them into the wall. (If you’re about to hang multiple skateboards, hammer the nail or wall hanger by maintaining enough distance and proper alignment. And in that case, you can use a pencil and measuring tape.)
- Hang the Deck: Once you insert the nail or wall hanger in the wall and your deck is ready, simply hang the skateboard on the nail. Hang your skateboard’s deck vertically on the wall hanger or nail.
2. Skateboard Wall Mount
Using a skateboard wall mount is another effective solution among many practical ways to hang your skateboard into the wall. And to do so, you’ll need some tools and equipment, including:

- A drilling machine
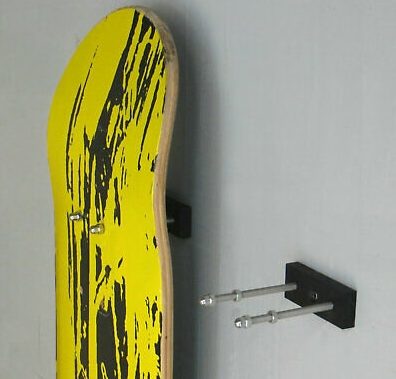
- A skateboard wall mount kit
This kit should come with a wall screw, a wall mount plate, a wall anchor, two long bolts, four nuts, and two T-nuts.
Once you’ve arranged all the necessary tools and equipment, it’s time to begin the hanging process. And here we’ve included step by step process, have a look:
- Drill a Hole: When it’s about using a skateboard wall mount kit, start by drilling a hole. Drill multiple holes if you’re planning to hang several skateboards. After drilling the wall, insert the plastic wall anchor into it.
- Attach the Wall Mount Kit: Now insert both to provide long bolts through the backside of the mounting plate. And secure both of them through the provided washer and nuts. To ensure a nice and simple display, screw the remaining two bolts up to half of the two long bolts.
- Insert the Deck: Now screw the wall mount plate onto the wall through the wall screw. Properly secure the wall mount plate so that it does not move after you hang your skateboard deck. Hold your deck and insert it into the two long bolts through your deck screw holes (the bolts should be on your deck hauling side.)
- Secure the T-Nuts: In the last step, just place both t-nuts on long bolts and tighten them gently to secure the deck. And this is how you can hang your favorite skateboard on the wall.
3. The Rope Hanger
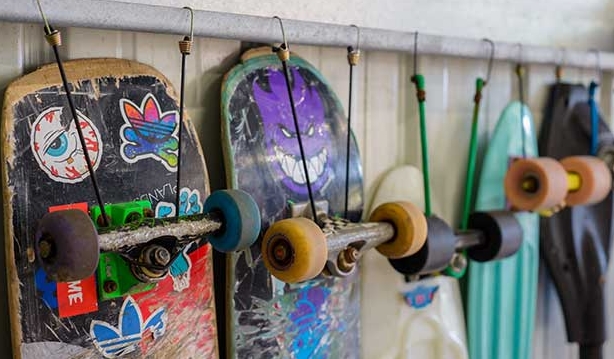
Using the rope hanger method is another simple but effective way to hang your skateboard to the wall. And this is the only simple way to hang a skateboard without removing the truck and other accessories.

You have to arrange some tools and equipment to perform the rope hanging process, including:
- Rope
- A wall screw or hook
- Driller
Once you arrange all the necessary tools and equipment, you can proceed to the hanging process. Here are the steps that you have to follow:
- Cut the Rope: You can use any nice and robust rope and cut it with a length of 25 inches or 64 centimeters.
- Tie a Knot: Now wrap the rope around the truck and tie a knot. And to ensure a firm knot, you can melt the edges of the rope with heat.
- Drill the Wall: Now, choose the desired wall location and drill it to hang your skateboard. Try to insert the plastic wall anchor into it and then insert the wall screw.
- Hang the Deck: Once everything is ready, now hang the skateboard to the wall through the rope you’ve attached.
As you can see, it’s pretty simple. However, it’ll be far better if you use a wall hook instead of a wall screw to hang your skateboard.
4. Command Strips (Doesn’t Require Nails or Drills)
Last but not least, using a command strip is the best and most effortless solution to hanging a skateboard on the wall. It’s the most effortless solution because you don’t have to use any hammer or nail or a wall hanger to hang your skateboard.

And to hang your skateboard through the command strip, you just have to arrange two things, including:
- Suitable Command Strip
- Fishing Line or Any Colorless String
Well, after getting the right command strip, follow the below steps to mount your skateboard on the wall:
- Get a Command Strip: If you want to follow this no nail or drill process, you must arrange a command strip that can withstand at least 5-6 pounds. That is because most skateboards can weigh up to two or three pounds.
- Attach Strap Into the Hook: The next thing you have to do is attach the strap to the hook. Well, to do this simply peel off the red side or command portion of the strip and stick it on the back of the hook.
- Place the Hook on the Wall: After properly attaching the strip to the hook, peel off the black side or wall portion to attach the hook to the wall. However, while putting the hook on the wall, don’t forget to clean the wall with a dry rag. Clean the wall and simply attach the stick to the wall by putting gentle pressure.
- Insert the Fishing Line: Now, insert the fishing line through the screw holes of your deck and give it a knot. After ensuring a secure knot, now hang the deck on the hook through the fishing line. And that’s it!
Conclusion
As you can see, it’s not tough to learn how to hang a skateboard on the wall, and you can follow many different ways to mount your skateboard. However, using a fishing line or command strip would be the best and most effortless solution to show off your deck. I’ve also linked all the necessary tools for easy access.